10 tips & tricks for using the new WordPress Block Editor

- By Sian Thomas Digital Marketing Executive
- Published
- Category Content & PR
If you use WordPress for your site or blog, you might have noticed a pretty big change over the past few weeks. The latest WordPress 5.0 update has taken away the Classic Editor that we all know and love and replaced it with the new Gutenberg editor, also known as Block Editor.
Change is always a bit scary at first but, while it’s taken a few posts and attempts to get used to it, we’re finding that the new Block Editor is a fantastic resource to make your articles look fresh and up to date, as well as having excellent functionality. Not only can you quickly edit individual content blocks with the freedom to easily move these around to build pages, we’ve also got new functions such as reusable blocks, gallery image layouts and more.
1. The Basics – what does everything do?
The first thing you need to know with the new Block Editor is how to get started. When you open a new post, you’ll be presented with a blank screen. Here are what each of the different buttons and components do:
![]()
Different blocks
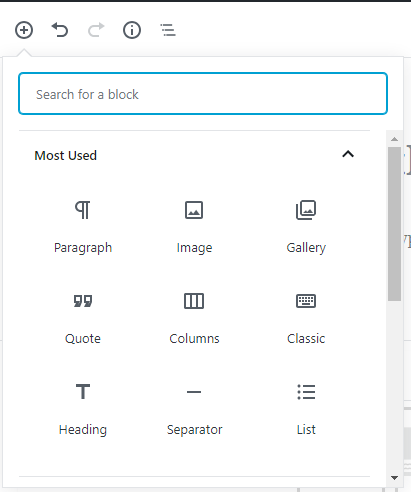
To create a post, you need to add a new block. This might be a simple Paragraph block that allows you to simply type text into a box; it might be an Image block, where you can insert a picture. When you click on the “Add Block” button, which is either found at the top left side of the editor, as shown in the image below, or flashes up alongside your content or between blocks when you hover over these areas, you’ll be given a number of options.
It first shows you your Most Used blocks followed by Common Blocks and other options, such as Formatting (blocks that will allow you to switch to Classic mode, HTML etc.) and Layout Elements (blocks such as Columns, Page Breaks and Separators). You may also have other options that are unique to your specific site theme or from plugins you’ve downloaded – see our tip number 9 for some examples of these.
NB: As long as you know the basics on where to begin with adding a new block, the rest is fairly user-friendly, but we’ll go into some more detail on what specific parts, such as the Information Button, do later in this article.
2. Inserting images
Including images in your blog posts has never been easier thanks to the new Block Editor. There is a vast array of options, all very intuitive and user-friendly, to allow you to insert images into a post easily and with a greater degree of freedom over size and placement.
Individual image blocks
To insert a single image in your blog post, you simply add a new Image Block:
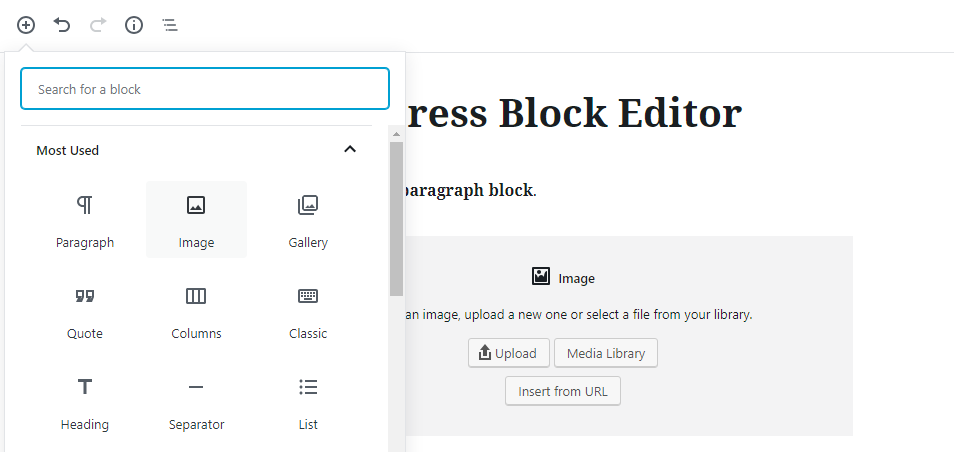
From here, you can see the options, below the dropdown for a new block, to Upload an image directly, select from the Media Library or Insert from URL, as was possible in the old editor. But these aren’t the only options:
Drag & drop
You can easily grab an image from your computer files by dragging and dropping it into the Image Block you’ve already created.
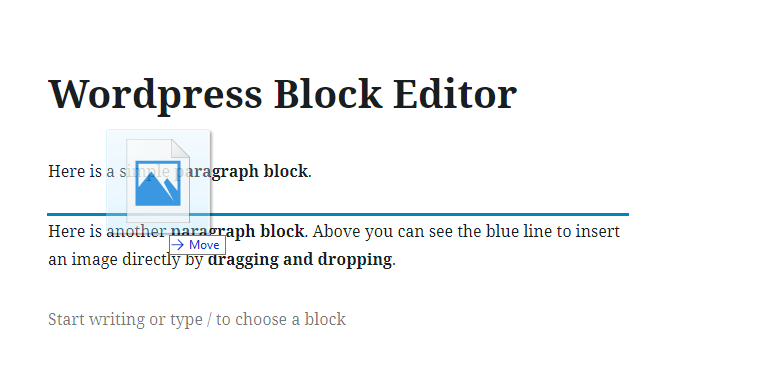
Or you can simply create a new Image Block by dragging and dropping the image where you want it between existing Blocks in your post. Make sure the blue line appears so that it drops into the right place:
Copy & paste
In addition to dragging and dropping, the new editor also gives you the ability to copy and paste an image, creating a new Image Block. This is a very simple function that can save a lot of time and effort.
Columns
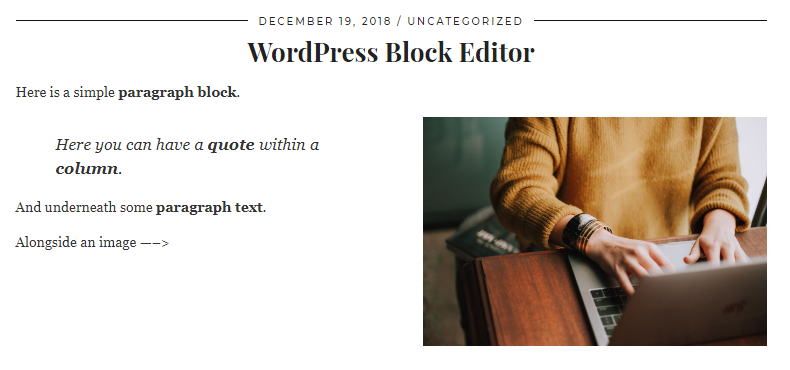
One of our favourite options for the new Block Editor is the ability to use multi-column layouts for your content. This was always a sticking point with the old editor – users would need to work around it with additional plugins or a particular theme with a page builder to get around it. Now you can simply add a Column Block which allows you to add whichever type of block works for your purpose – including paragraphs, images, collages, quotes and more. This gives you the freedom to layout your post however you like:
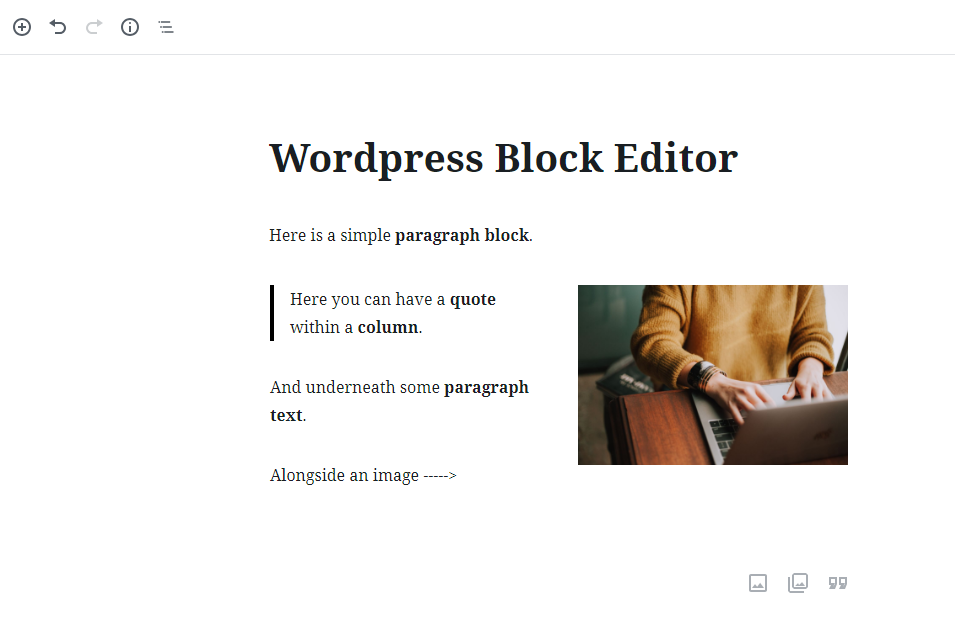
The above image shows this as it looks in the Visual Editor where you can make changes; see below for how it would look live on the page:
Gallery
In addition to inserting individual images on the new editor, you can easily create a new Gallery using images from your Media Library. Where this was a sorely limited function on the old WordPress, requiring additional plugins or needing to create a collage of images, it’s super easy on the new Block Editor. You have the ability to rearrange the images to the order you’d like them, giving you even further freedom over how your post looks, with a choice over the number of columns, how images are cropped and where they link to:
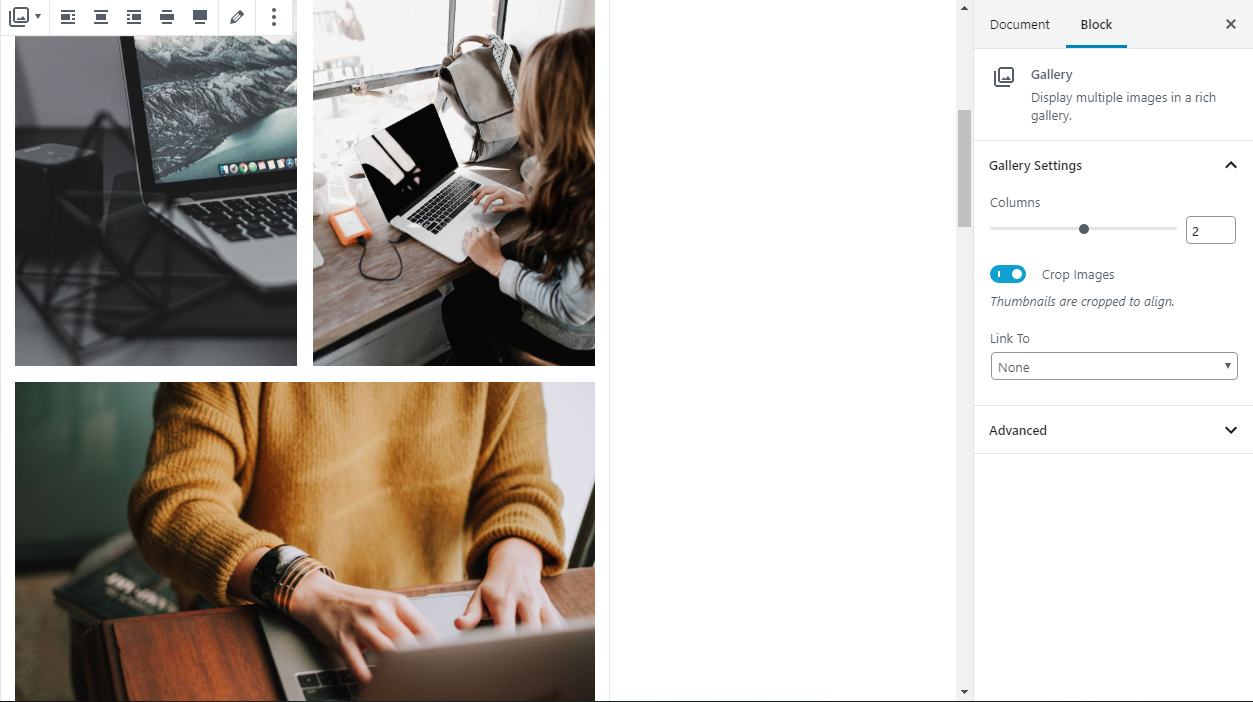
Editing images
Where before in the old editor, you needed to go to the Media Library or click on an individual image and open a separate box to edit your Alt Text, link settings, image size and dimensions, this is now done simply via the “Block” sidebar tab to the right-hand side of the editor. It’s a simple change that makes a big difference.
3. Keyboard shortcuts
One big benefit of the new editor, aside from the freedom you have with navigating blocks, is the vast range of keyboard shortcuts that mean you don’t even need to take your fingers off the keyboard to create a comprehensive article. There’s even a shortcut for finding the shortcuts! Shift + Alt + H will show you all shortcut options!
Here are a few useful ones:
- Press Enter for a new block
- Shift + Enter creates a line break
- Type / to quickly create a new block type
- Shift + Tab to show more options
- Ctrl + Alt + T for inserting a block before; Ctrl + Alt + Y for inserting a block after
4. Transforming blocks
If you’ve got a block that started life as a paragraph, but you’d now like as a quote, heading, list or other block option, you have the option for this. Simply select the block, then choose the far left icon which becomes a “Change Block Type” icon when you hover over it, opening up a “Transform To” menu:
![]()
5. Block Navigation
The freedom to switch your content around without having to select, cut and paste is a massive advantage of the new editor.
Hovering your cursor over a block will cause arrows and dots to appear at the left-hand side. You can click the up or down arrows to move this block one place up or down, or you can select the dots to drop and drag the block to wherever you’d like it to sit in the post:

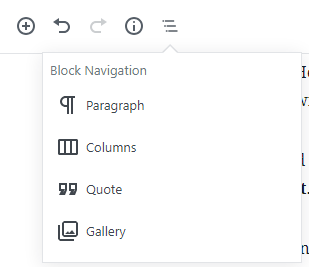
To see the overall layout of your content, you can select the “Block Navigation” function on the top bar of your editor. Clicking on the individual blocks will take you straight to the one you want:
6. Information Button
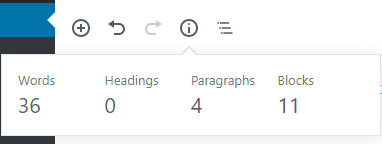
Also on the top bar, you have an Information button. Where before WordPress would give you an ongoing word count of your content while you were editing it in the bottom corner, the information button now shows you this, along with your number of headings, paragraphs and blocks:
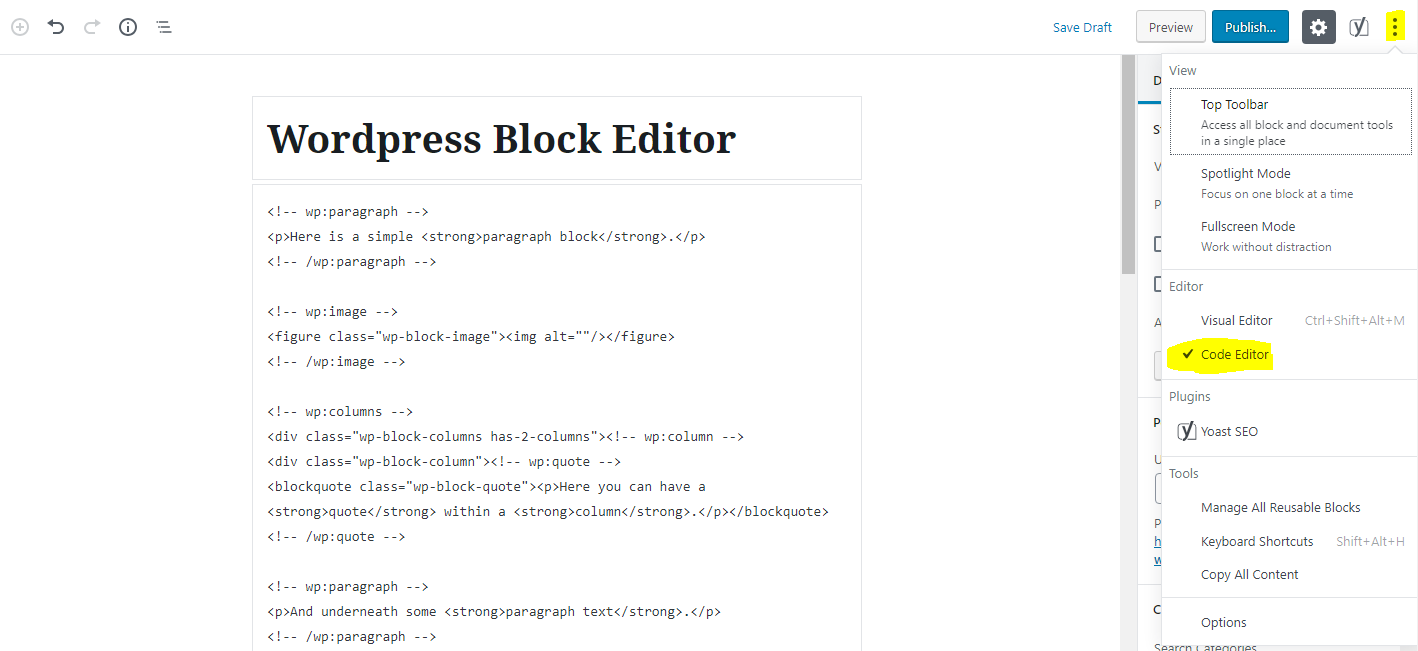
7. Edit as HTML
If you have an HTML code to add to your content, or you’d prefer to edit your content using HTML rather than the visual editor, there’s an easy option for this. You can either choose to edit a single block in HTML using the “Edit as HTML” option under the three dot dropdown menu when a block is selected, or you can edit the entire post in HTML by choosing “Code Editor” under the three dot dropdown in the top right hand side of the page, beside the Preview, Publish etc. buttons:
8. Reusable Blocks
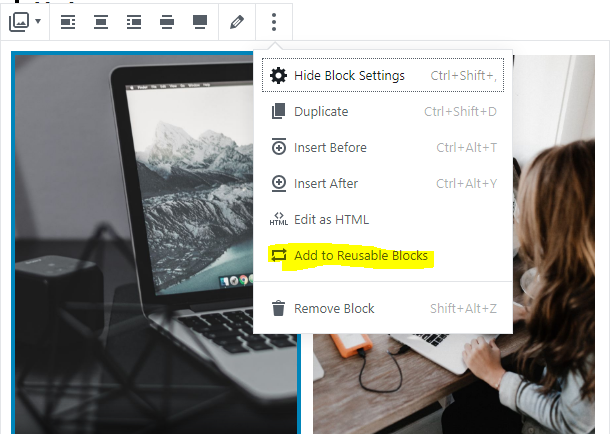
Reusable blocks are a very handy tip to get a hang of, allowing you to reuse a specific piece of content as a single block where required.
These are easily created. When you have a block you’d like to save as a Reusable Block template, simply select the block and click “Add to Reusable Blocks” from the dropdown menu. You can then save this under a name of your choosing.
As an example, for one of our clients’ blogs, each article is focused around a different health product on their site, of which there are 4 in total. At the bottom of each post, there’s a product logo, a description of the product and link to click to find the product. Previously we needed to copy and paste this for each individual article, whereas now, you can simply find and insert this blurb by choosing to add a new block, selecting Reusable Blocks, then choosing the specific one you need:
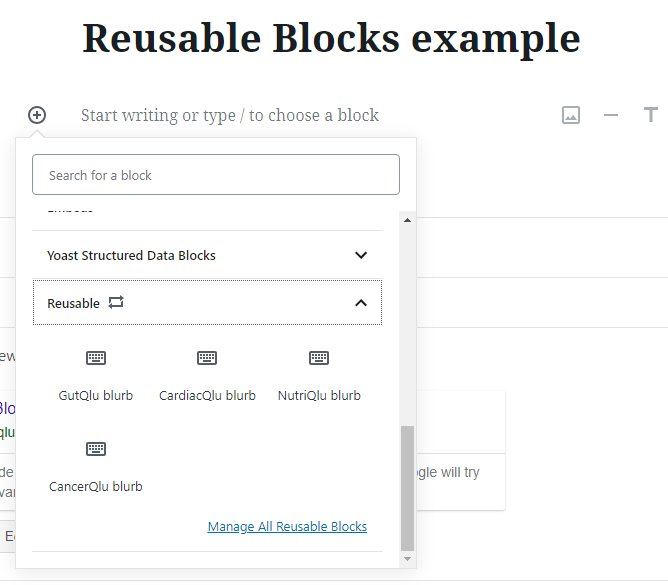
These blocks can also be accessed and edited via the “Manage All Reusable Blocks” link in the dropdown above.
Tip: Some ideas for Reusable Blocks are as a post signature, an author bio or a disclaimer on the bottom of your article.
9. Using plugins as blocks
Blocks aren’t just limited to the ones that WordPress provides for you as standard. In fact, there are a selection of plugins (the number of which will only be set to increase now) that can be used as blocks too. One example of this is useful for food bloggers: the WP Recipe Maker. These are accessed as usual from the Add Block button where you’ll find your Most Used blocks, Common Blocks etc.
You might find that some existing plugins you already had on WordPress have moved into your Add Block menu when you update – for example, Yoast might have given you Yoast Structured Data Blocks to allow you to easily insert a properly formatted How-To guide, or your mailing list service might have an option to include an easily embedded form as a block.
The options for these are endless, allowing you to have far more freedom over your content without the need to resort to HTML codes or complicated plugin settings.
10. Find the old Classic Editor
If all else fails and you’re struggling to get your head around the new editor, or perhaps you have a client who doesn’t want the backend of their site to change, there are two ways you can go back to the classic WordPress editor you’re used to.
1. When creating a post using Block Editor, you can select “Classic” from “Add Block”. This will incorporate a block within the post that looks just like the old WordPress editor, with the same old toolbar and a text box that doesn’t convert into individual blocks, unless you want it to.
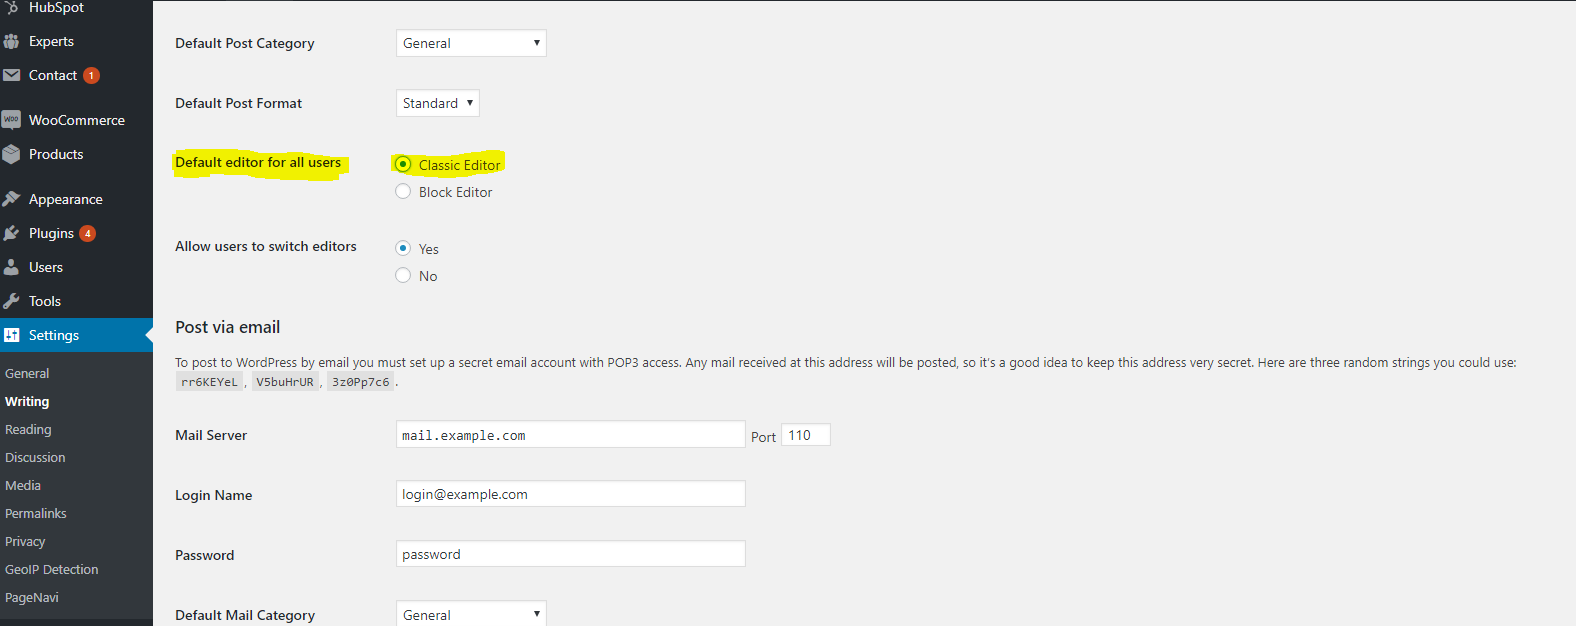
2. Download the Classic Editor plugin. This is an official WordPress plugin and is the best option for those who don’t want to try out the new system. For clients who want to stick to the old method, you can simply download the plugin then select Classic Editor as the default for all users under Settings > Writing. When they create a new post, it will then automatically look exactly how they knew it before.
What about your old posts?
All your old content will, of course, still exist, but if you’re now using the Block Editor as default, when you go to an old post, you’ll see it as a single Classic Block embedded within the Block Editor. You can either leave these alone and nothing will be different about them, or you can update them to make editing even easier. Do this by selecting the block then choosing “Convert to Blocks” from the dropdown menu.
What are your thoughts on the new Block Editor on WordPress?

Gutenberg blocks are appalling – how dare they force this upon us?
I think it’s like most big changes, we hate it at first but when we realise it’s not going to change back we end up using it and liking it? Windows 10 anyone!?