The Art of Cinemagraphs
Cinemagraphs (a combination of cinema and photograph) are living photographs, a still image with subtle animation that infinitely loops to create a mesmerising effect. Although they look complex they are relatively easy to produce in Photoshop. The key to a great Cinemagraph is choosing the right footage.
Choosing footage
Whether you shoot video yourself or purchase stock footage there are a few things to bear in mind…
Choose a short video clip, the shorter the better. This will help when you come to edit your Cinemagraph as the longer your original footage the more time you will spend trimming it down. The final animation should be around 1-3 seconds in length as longer videos mean far larger file sizes.
Your footage needs to be as still as possible, the end frame of your footage needs to closely match the start frame. Using a tripod makes this far easier. Most importantly, only objects in the scene may move, not the camera itself. This is easily achieved if you shoot it yourself using a tripod but harder to find on Stock footage websites. The quality of the finished animation is greatly affected by the quality and stillness of the original footage you choose.
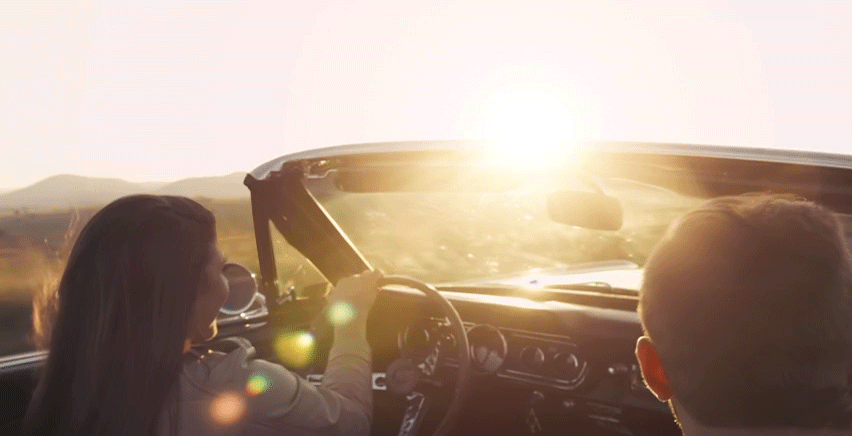
Ideal subjects for a Cinemagraph are slow moving scenes that lend themselves to infinitely looping in real life, such as ocean waves, rain or hair blowing in the wind. A high speed video of a sports match with a large degree of motion would be unsuitable.
Creating a Cinemagraph in Photoshop
Although online subscription services such as Flixel exist it’s easy and relatively quick to create Cinemagraphs in Adobe Photoshop following the process below:
- Open your video file the same as you would a still image.
- Open the timeline panel if it’s not already open. Most of the work will be done inside it.
- To pick the first frame of your Cinemagraph scrub forward in time (using the preview slider) a few seconds. It’s important to leave a gap between the beginning of your footage and the actual start of the Cinemagraph for later on in the process.

- Click and drag the start of your footage to the right to the point you want to begin your Cinemagraph. This will trim the footage to its new start point but importantly won’t delete the footage so we can use it later on.

- To decide the length of your animation Click and drag from the end of the footage to the left. It’s important to make it as short as possible, around 1-3 second is optimum.
- When you preview the video you will notice a jump between the last and first frame. Ironing out this jump will make or break your Cinemagraph.

Blending the footage
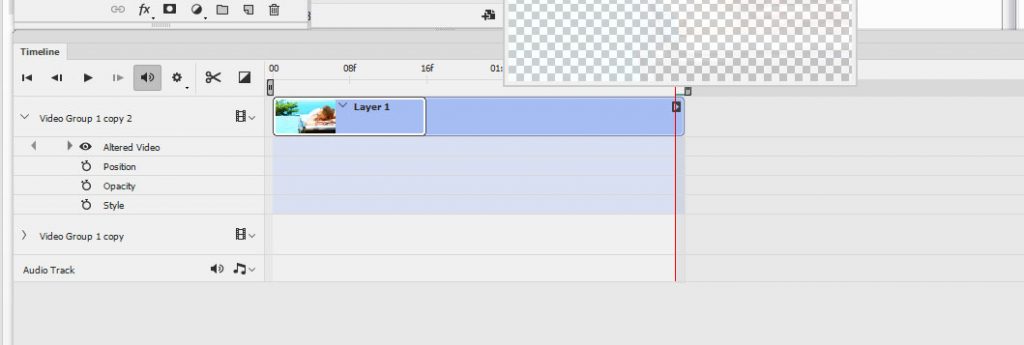
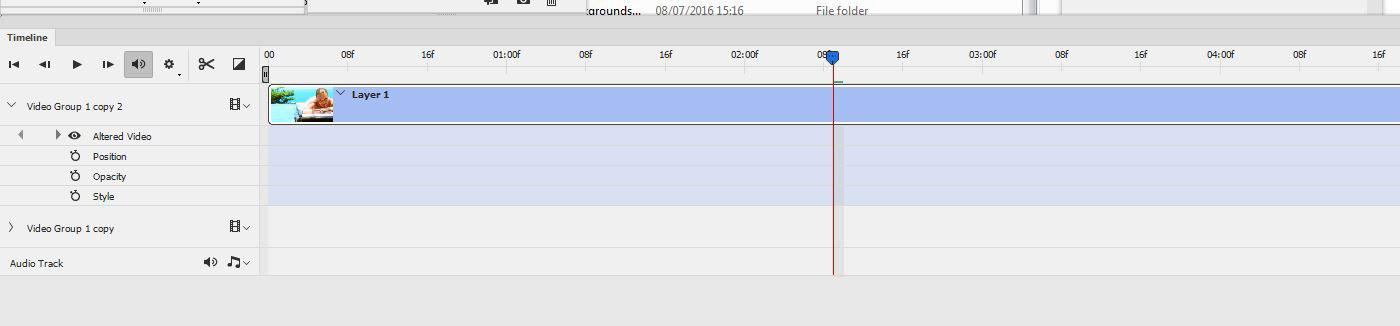
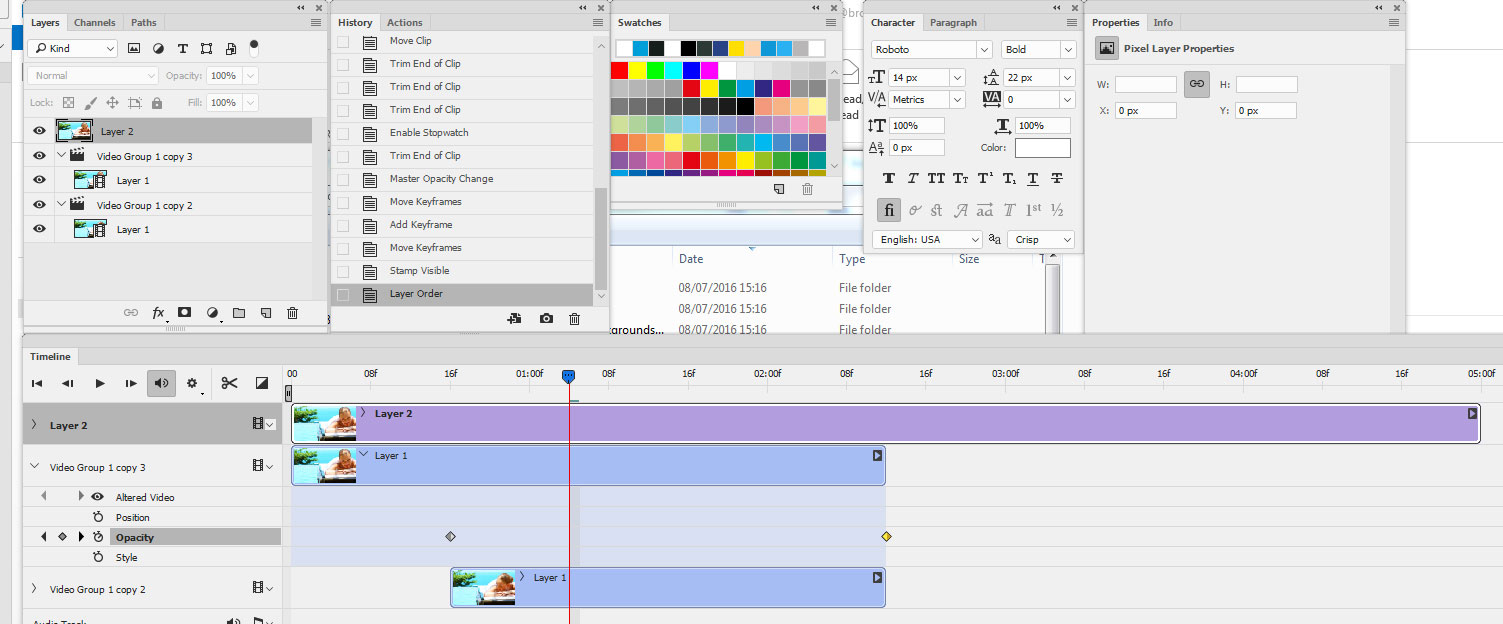
- Duplicate your video group
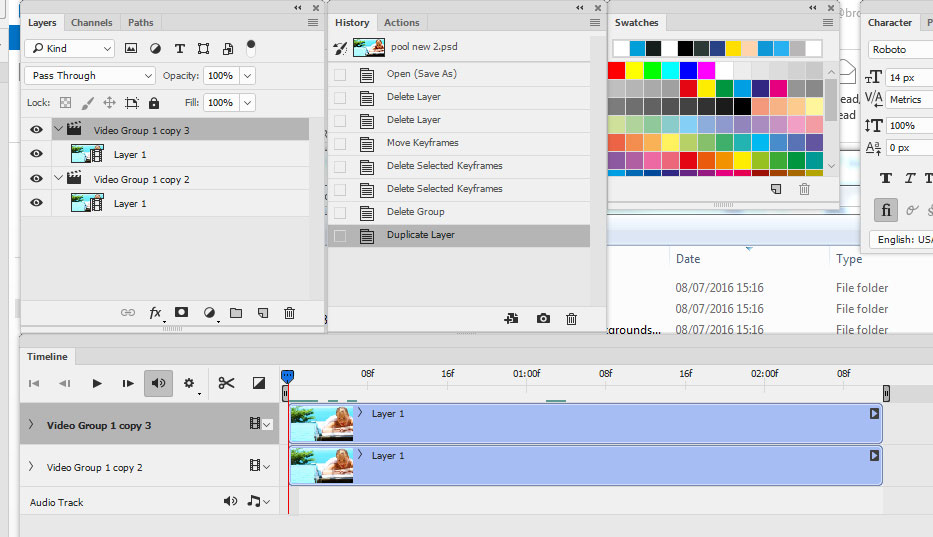
- Move the bottom video layer to the right all the way to the end of the top video layer

- Click and drag the start of the lower footage as far as it will go to the left. This reveals the footage we trimmed earlier.

- Click and drag the end of your lower footage in line with the end of the upper footage.

- We now need to make sure the top footage is invisible by the time it gets to the end which will allow the bottom footage to become visible.


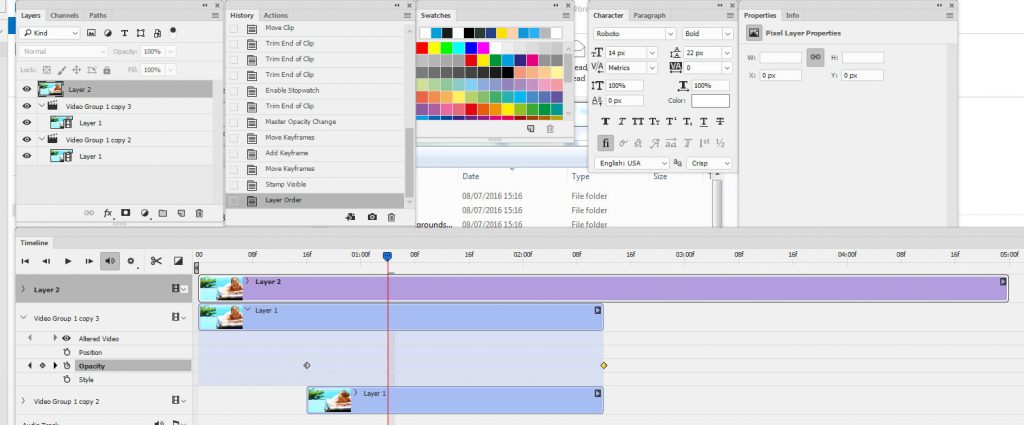
Keyframes
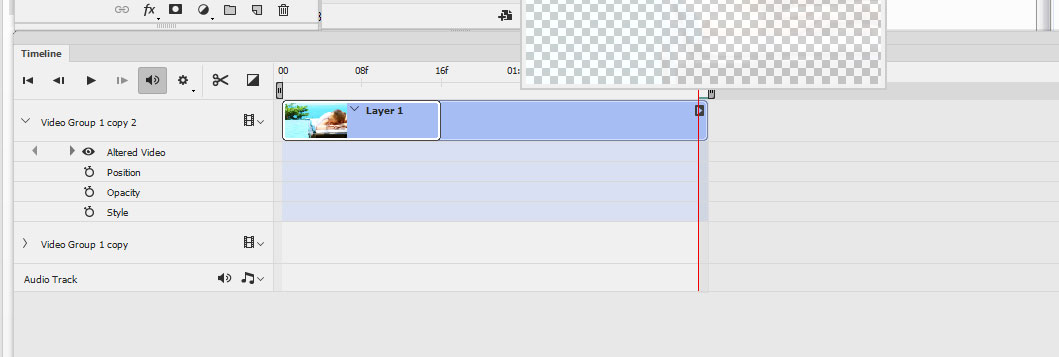
- Click the triangle icon to the left of the video group 1 title in your timeline. This will open up properties for position, opacity and style. We only need opacity for this exercise.

- Drag your preview slider to the start of the lower footage. (This is where we want the fade to begin).

- Click on the opacity stopwatch icon to create a ‘keyframe’ (a marker on the timeline that captures your settings at that point) A yellow dot should have appeared below your top footage.
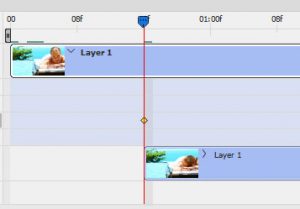
- Drag the preview slider to the end of your footage and alter the opacity of the layer to 0%. This will create a second keyframe. The beginning of your top footage will now be 100% visible and the end will be invisible.
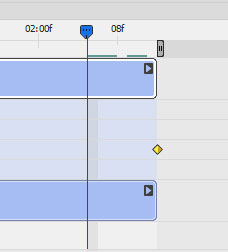

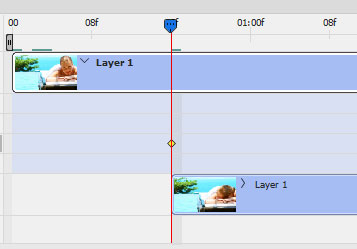
Your footage will now seamlessly loop.
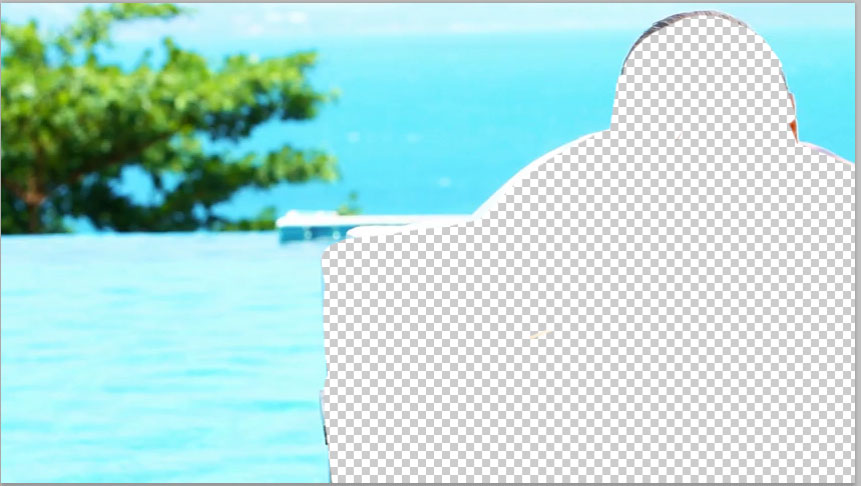
Masking
We now need to clean up any areas that we don’t want animated. To give the illusion of an animated still photograph we only want a tiny part of the composition to have motion.
- Find a good place in your footage (using the preview slider) to use as your image background
- Hold Shift+Ctrl/Cmd+Alt+E keys to create a still image snaphot of the current layer.
- Make sure this layer is at the top of your layer stack.
- Trim the layer to the end of your footage by clicking and dragging it from the right.
- Create a layer mask on the snapshot layer by going to Layer menu, then layer mask and select reveal all.
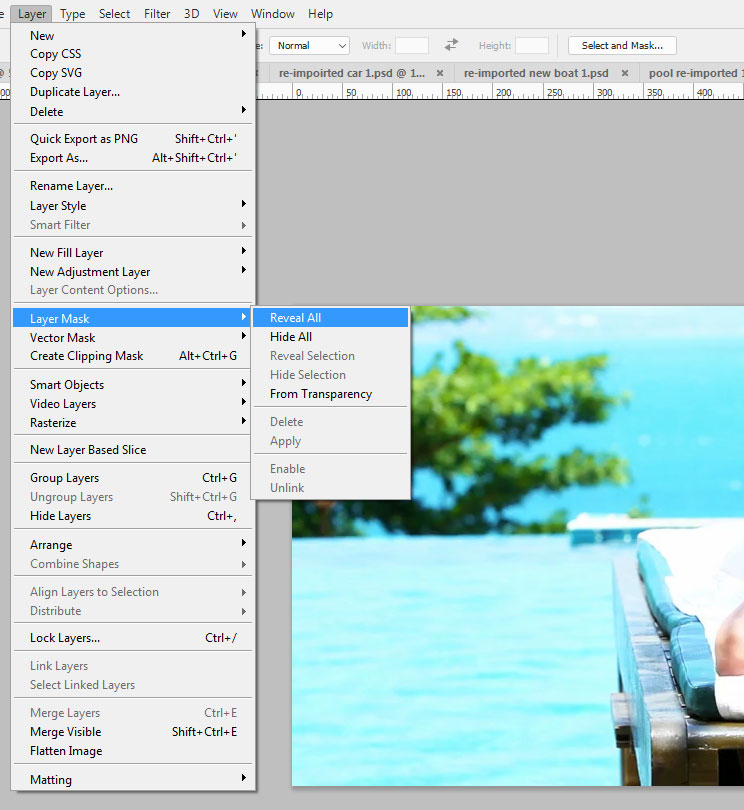
- Click on your paintbrush tool. (a brush with feathered edges will help make the effect smoother) and paint black onto all of the areas you want to be animated (doing this makes the still layer invisible and the footage layers show through).
Exporting your Cinemagraph
Cinemagraphs are traditionally saved as Gif files for maximum compatibility. The idea is to create the smallest file size while still aiming for a good quality animation.
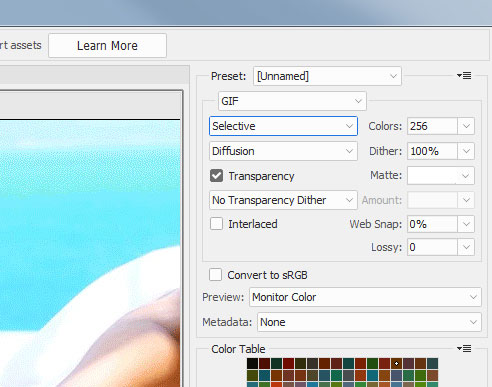
- File menu/export/ save for web (legacy)
- Choose Gif from the top menu
- The idea is to create the smallest file size while still aiming for a good quality animation.
- Choose ‘Selective’ from the colour reduction menu.
- Select ‘Diffusion’ from the dither menu
- Adjust the image size to the actual size you want your animation to be exported at. This will greatly affect the final file size.
- Select ‘forever’ from the looping options window to make your Cinemagraph infinitely loop.
There are several limitations with exporting as an animated gif. The colours are restricted to 256 max and the image quality is nowhere near high definition.

Other export options
Its also possible to export Cinemagraphs as HD mp4 video files. The beauty of this is that the quality of your animation won’t be compromised. Social media platforms such as Facebook, twitter and Instagram support these files and they can be uploaded as you would with any regular video. The ideal setting to use for HD Cinemgraphs is H.264 (the same codec used for exporting videos for Youtube).
Be warned though, these files won’t automatically loop and you may find yourself having to iframe Youtube or similar video apps to get your animation to display on a website.